
A bouquet of fresh flowers is a timeless gift, but its presentation can elevate it from simple to truly special. While cellophane and fancy papers have their place, there’s an undeniable rustic charm and eco-friendly appeal to using a simple paper bag. This method transforms an everyday object into a stylish and sturdy carrier for your blooms, evoking the feel of a quaint farmer’s market or a European flower stall. It’s a creative, affordable, and surprisingly easy technique. This guide will provide clear, beginner-friendly instructions on how to wrap flowers in a paper bag, helping you create a beautiful and memorable gift.

Wrapping flowers in a paper bag combines simplicity and elegance, making it an ideal choice for gifting or home décor. This technique not only highlights the natural beauty of the blooms but also adds a personal, handmade touch that feels thoughtful and unique. Whether for a special occasion or just to brighten someone’s day, this method allows you to create a charming presentation with minimal materials and effort.
Why Choose Paper Bag Wrapping?
Using a paper bag for flower wrapping is an eco-friendly and versatile option. Unlike plastic or synthetic materials, paper is biodegradable and contributes to reducing waste, aligning with sustainable practices. Additionally, paper bags are easy to customize — you can add decorative ribbons, stamps, or even handwritten notes to make the arrangement feel more personal and creative. This method also emphasizes the natural aesthetic of the flowers, allowing their organic beauty to take center stage. By opting for paper bag wrapping, you’re not only showing thoughtfulness but also supporting environmentally conscious choices.
Step-by-Step Guide on How to Wrap Flowers in a Paper Bag
Step 1: Gather Your Simple Materials
Before you begin, gather the few materials needed for this charming project. You will need a standard paper grocery bag, preferably one without any prominent logos or, even better, a fresh one from a craft store. You will also need your bouquet of flowers, a pair of scissors, some string or twine, and a small, water-tight plastic bag with a rubber band. For an added touch, you might want some tissue paper and a gift tag. Having all your supplies ready will make the process smooth and enjoyable, allowing you to focus on the creative aspect of wrapping your beautiful flowers.
Step 2: Prepare Your Flower Bouquet
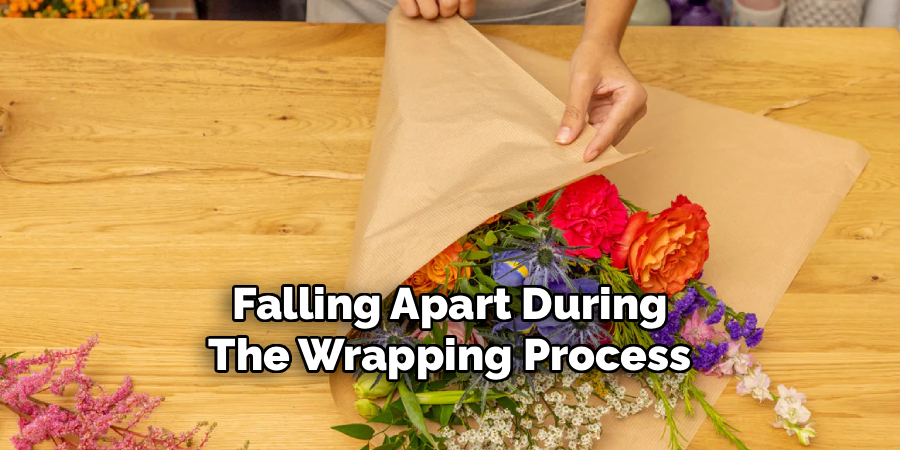
The first step in preparing your bouquet is to ensure the flowers are fresh and well-hydrated. Trim the stems at an angle under running water to help them absorb moisture. Remove any leaves that will fall below the water line, as these can rot and introduce bacteria. Arrange the flowers in your hand, creating a visually pleasing composition. Once you are happy with the arrangement, secure the stems together tightly with a rubber band or a piece of twine. This keeps your bouquet from shifting or falling apart during the wrapping process and makes it much easier to handle.
Step 3: Create a Water Source
To keep your flowers fresh until they reach their final destination, you need to provide a temporary water source. Take a paper towel, fold it into a small square, and saturate it with water. Squeeze out the excess so it is damp but not dripping. Wrap this damp paper towel securely around the base of the trimmed stems. Next, place the stems inside a small, water-tight plastic bag (like a sandwich bag or a dedicated floral water bag). Use a rubber band to fasten the top of the plastic bag snugly around the stems, creating a leak-proof water pack.
Step 4: Prepare the Paper Bag
Now you will transform the paper bag into a custom wrapper. Place the bag on a flat surface. Using your scissors, carefully cut down one of the corner creases of the bag, from the top opening all the way down to the bottom. Then, cut along the edges of the square bottom to detach it completely, leaving you with one long, flat rectangular sheet of paper with the bag’s handles at one end. This single large sheet will become the wrap for your bouquet, giving you plenty of material to create a beautiful, layered look.
Step 5: Position the Bouquet on the Paper
Lay your flattened paper bag on your work surface. If you are using tissue paper for extra color and protection, place one or two sheets in the center of the brown paper. Now, place your prepared bouquet on top. The flowers should be positioned diagonally across the paper sheet. The blooms should be angled toward one of the top corners of the paper, while the base of the stems points toward the opposite bottom corner. This diagonal placement is the secret to achieving the classic, stylish, and overlapping wrap seen in professional flower shops.
Step 6: Make the First Fold
With your bouquet positioned diagonally, you are ready to make the first fold. Take the bottom corner of the paper—the one closest to the base of your flower stems—and fold it up and over the stems. This fold should cover the plastic water bag at the base and secure the bottom part of your bouquet. The fold should be snug enough to hold everything in place but not so tight that it crushes the stems. This initial fold creates a clean base for your wrap and conceals the functional water pack, starting to form the conical shape.

Step 7: Complete the Wrapping Process
Now you will complete the wrap by folding in the sides. Take the side corner of the paper that is on your left and fold it inward over the bouquet. The paper should lay across the front of the stems. Crease the paper gently to hold its shape. Next, take the remaining side corner from your right and wrap it all the way around the bouquet, overlapping the first side fold. This final wrap should encircle the entire bouquet, creating a cone-like shape that is open at the top, beautifully framing the blooms.
Environmental Benefits of Method
- Reduces the need for plastic or non-biodegradable wrapping materials, making it a more eco-friendly choice.
- Promotes the use of recyclable or compostable paper, minimizing environmental waste.
- Encourages a zero-waste mindset by utilizing sustainable materials that decompose naturally.
- Helps decrease reliance on synthetic packaging, which can contribute to pollution.
- Aligns with environmentally conscious practices by reducing carbon footprints associated with production and disposal of non-eco-friendly wraps.
Frequently Asked Questions (FAQ)
What Kind of Paper Bag Is Best for Wrapping Flowers?
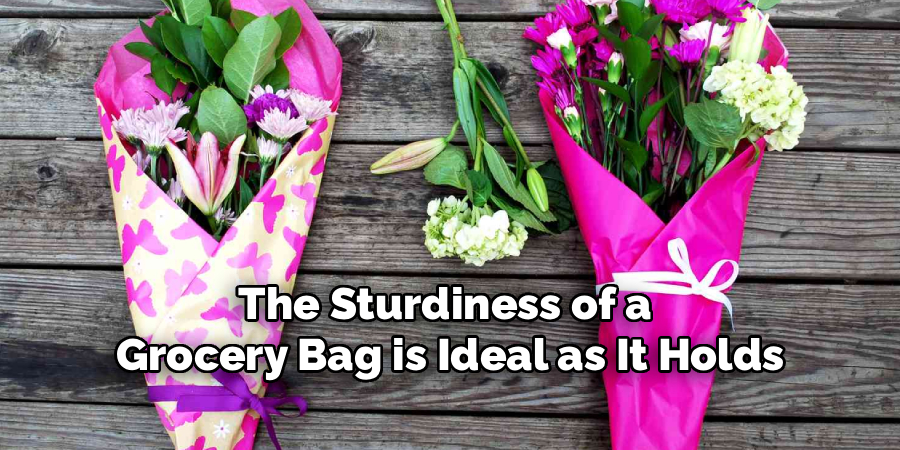
The best option is a standard brown or white paper grocery bag with a flat bottom. Ideally, choose one without any store branding for a cleaner, more rustic look. Craft stores often sell plain paper bags in various sizes, which are perfect for this. The sturdiness of a grocery bag is ideal as it holds its shape well and protects the flowers.
How Long Will the Flowers Stay Fresh in the Wrap?
With a proper temporary water source—a wet paper towel sealed in a plastic bag at the base of the stems—the flowers should stay fresh for several hours, easily long enough for gifting. This method provides enough moisture to keep the blooms from wilting during transport. For best results, advise the recipient to place the flowers in a vase with fresh water as soon as possible.
Can I Use Something Other Than a Paper Bag?
Yes, while a paper bag offers a unique rustic charm, you can use the same diagonal wrapping technique with other materials.
- Kraft paper: This is very similar to a paper bag and comes in rolls.
- Newspaper: Offers a vintage, classic look.
- Burlap: Provides a highly textured, rustic feel.
- Fabric: A piece of cotton or linen can create a beautiful, reusable wrap.
How Do I Prevent the Paper Bag from Getting Wet?
The key is to create a reliable, leak-proof water pack for the stems. Ensuring the plastic bag you use has no holes and is fastened very securely around the stems with a rubber band is crucial. The damp paper towel should be moist but not dripping wet. This preparation prevents any water from seeping out and creating a soggy spot on the paper wrap.
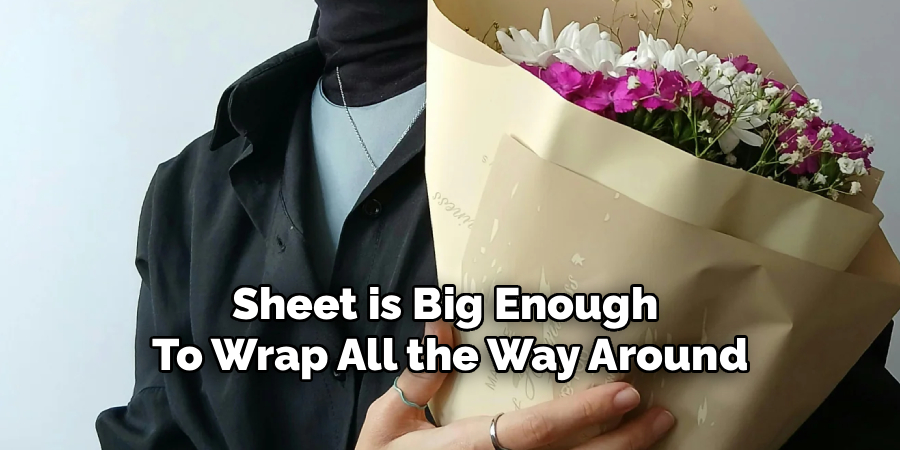
Is This Method Suitable for Large Bouquets?
Yes, this method works well for bouquets of all sizes. For a very large or tall bouquet, you may need a larger paper bag, such as an extra-large grocery bag, to ensure the paper sheet is big enough to wrap all the way around. The principle remains the same: cut the bag into a flat sheet and wrap the bouquet diagonally to accommodate its size.
Conclusion
Presenting flowers in a creatively wrapped package adds a personal and thoughtful touch that is always appreciated. The paper bag method is not only charming and stylish but also sustainable and incredibly accessible. It proves that you don’t need expensive materials to create a beautiful presentation. With just a bag, some twine, and a few simple folds, you can transform a lovely bouquet into an even more special gift. Now that you have this simple guide on how to wrap flowers in a paper bag, you can confidently add a touch of rustic elegance to your next floral gift.