
Origami, the ancient Japanese art of paper folding, offers a wonderful way to create beautiful objects from a single sheet of paper. It’s a craft that combines creativity, precision, and a touch of magic. Among the many figures you can create, the paper frog is a classic and popular choice, loved by both children and adults for its simplicity and playful nature.
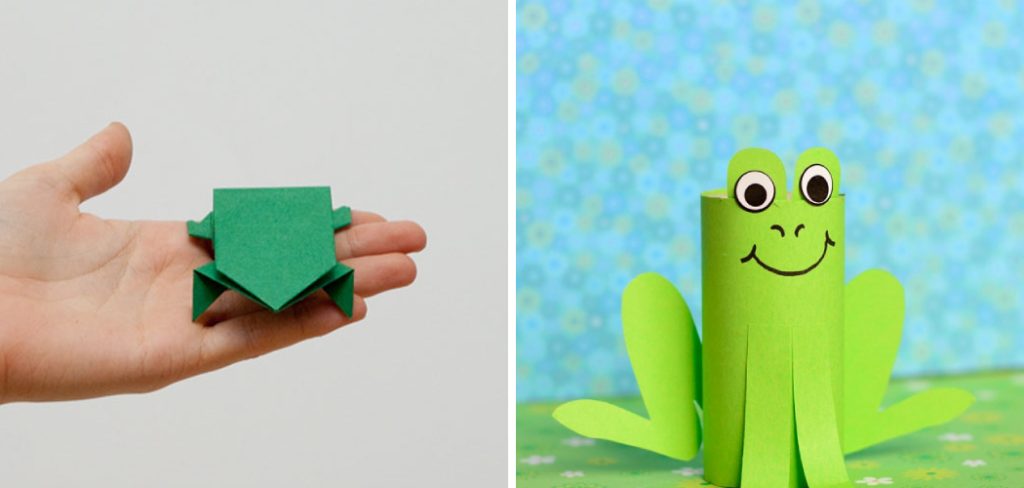
This activity is not just about folding paper; it’s a fantastic screen-free pastime that helps improve fine motor skills and concentration. Whether you’re a seasoned origami enthusiast or a complete beginner looking for a fun project, learning how to make a paper frog is a rewarding experience. Plus, you end up with a cute little toy that can actually hop! In this article on how to make a frog using paper, we’ll guide you through the steps and give you some tips and tricks to make your origami frog-making journey even more enjoyable.
Tools and Materials You’ll Need
To get started on your origami paper frog, you’ll need a few basic materials. These include:
- A Square Sheet of Paper
- Scissors (optional)
- Markers or Colored Pencils (optional)
8 Simple Step-By-Step Guidelines on How to Make a Frog Using Paper
Step 1: Prepare Your Paper and Make the Initial Folds
Begin with your square sheet of paper. If your paper has a colored side and a white side, place the colored side facing down on your flat surface. This will ensure your frog ends up being the color you want. The first step involves creating some foundational creases that will guide the rest of your folding process.

Fold the paper in half horizontally, creasing it инфек firmly. Unfold it, and then fold it in half vertically, making another sharp crease. When you unfold the paper, you should see two intersecting lines that divide your square into four smaller squares. These creases are vital for the symmetry of your frog.
Next, you will create diagonal creases. Fold the paper in half diagonally, bringing one corner to meet the opposite corner. Press down firmly along the fold to create a strong crease, then unfold it. Repeat this process with the other two corners, folding them to meet each other. After unfolding, your paper should now have a pattern of creases that looks like an eight-pointed star or an asterisk. These initial folds prepare the paper for the more complex steps ahead and establish the basic structure from which your frog will emerge.
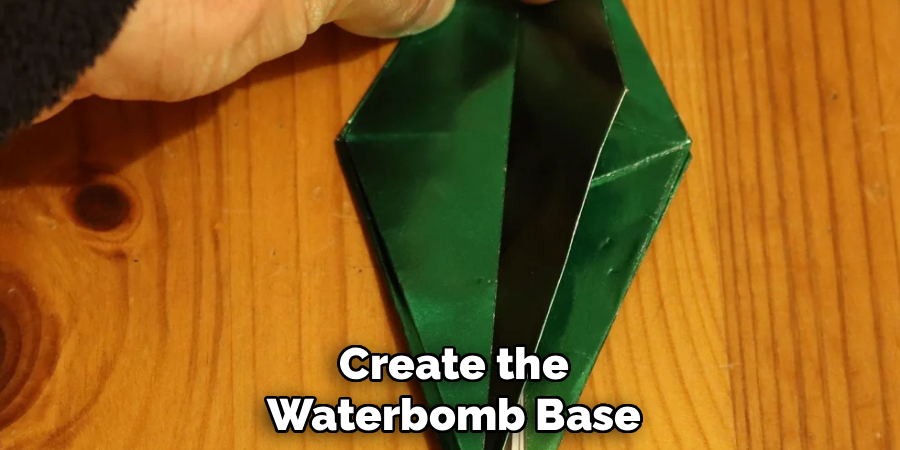
Step 2: Create the Waterbomb Base
The waterbomb base, also known as a balloon base, is a fundamental form in origami and the foundation for our frog. With the colored side of the paper still facing down, fold the paper in half horizontally. Now, you’ll perform a squash fold.
Take the top right corner of the folded rectangle and bring it down to the center-bottom point of the paper. As you do this, the paper will naturally want to collapse inwards along the creases you made in the first step. Guide it with your fingers to form a triangle on the right side. The vertical crease you made earlier will now fold inwards.
Repeat this squash fold on the left side. Bring the top left corner down to meet the center-bottom point. Again, the paper will collapse inwards along the existing diagonal crease. Once you have completed this on both sides, you will have a shape that looks like a triangle with two layers.
This double-layered triangle is the waterbomb base. Make sure all your corners are aligned and the creases are sharp. This base is a critical starting point, and a neatly folded base will lead to a much better-looking final frog.
Step 3: Form the Frog’s Front Legs
Now it’s time to create the front limbs of your frog. Position the waterbomb base so the open end of the triangle is pointing away from you. You are working with the top layer of paper only for this step. Take the bottom right corner of the top triangle and fold it upwards to meet the top point of the triangle. Crease this fold firmly. This action will create a smaller triangular flap on the right side. The edge of this flap should align perfectly with the center line of the main triangle.
Next, you will do the exact same thing on the left side. Take the bottom left corner of the top triangle and fold it up to meet the top point. Press the fold down to create a sharp crease. Your shape should now look like a diamond sitting on top of a larger triangle. These two new flaps you’ve just created will become the front legs of your paper frog. Take a moment to ensure they are symmetrical, as this will affect the frog’s final appearance and balance.
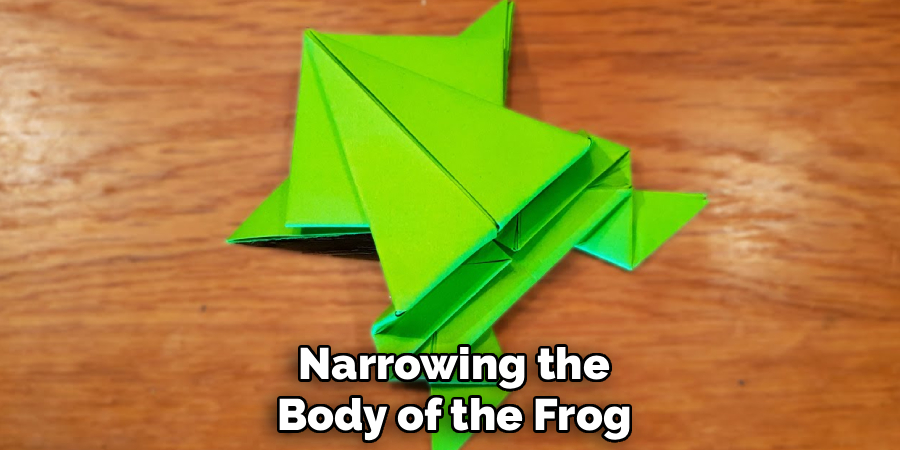
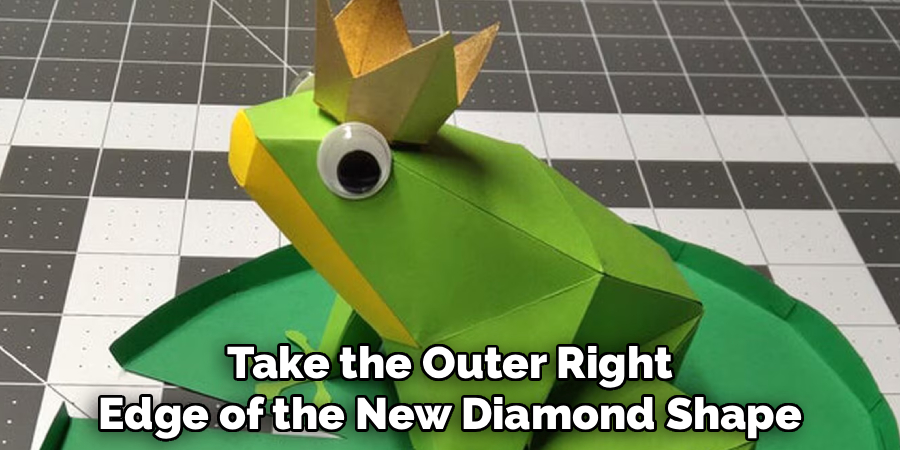
Step 4: Shape the Frog’s Body
This step involves narrowing the body of the frog and preparing for the back legs. You will continue to work with the flaps you just folded. Take the outer right edge of the new diamond shape and fold it inwards to meet the center vertical line.
The flap you are folding is the one you created in the previous step. Make a crisp crease. This fold brings the edge of the front leg formation towards the middle, slimming down the upper part of the frog’s body and giving it a more defined shape.
Repeat this fold on the left side. Take the outer left edge of the diamond and fold it to align with the center line. Press down firmly to secure the crease. Your paper should now have a shape that resembles a kite or an elongated diamond. These folds not only shape the body but also add layers to the model, which will be important for creating the tension needed for the frog to hop. Double-check that both sides are symmetrical and躺平 tightly against the center line.
Step 5: Fold the Back Legs Into Position
It’s time to work on the bottom part of your paper, which will become the powerful back legs of your frog. Flip the entire model over. The side you see should be a single, smooth triangle. Orient it so the point is facing away from you. Just as you did for the front legs, you are going to fold the bottom corners upwards. Take the bottom right corner of this triangle and fold it up to meet the top point. Crease it firmly.
Now, do the same for the left side. Take the bottom left corner and fold it up to the top point, creasing it well. Your model should now look like the diamond shape you had in Step 3, but this time on the reverse side. These larger flaps are the initial forms of the frog’s back legs. They are bigger than the front legs because they will be folded again to create the spring mechanism that allows your frog to jump. Ensure these folds are neat and symmetrical.
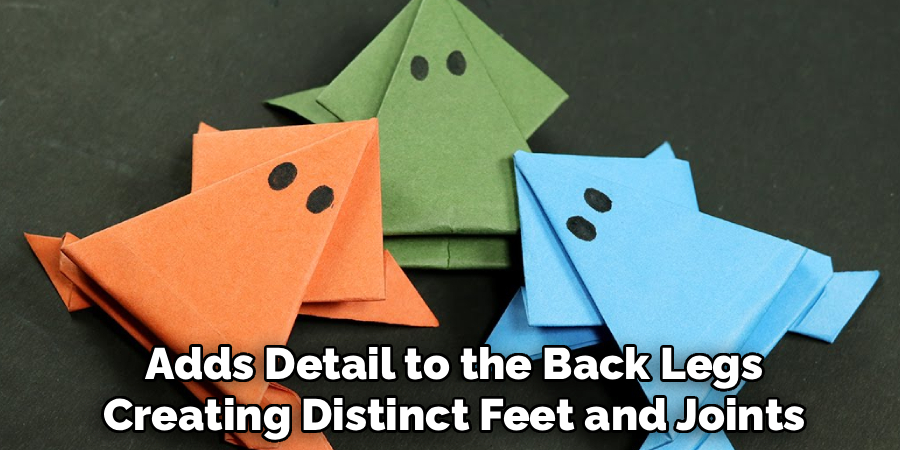
Step 6: Create the Feet and Ankles
This step adds detail to the back legs, creating distinct feet and joints. You are working with the flaps you just folded in the previous step. Look at the right flap. Fold its outer edge inwards so that it aligns with the center line of the model. This is similar to the fold you made in Step 4, but you are doing it on the back legs now. Press the crease firmly. This fold narrows the leg and starts to form the shape of the frog’s thigh.
Repeat this process on the left side. Fold the outer edge of the left flap inwards to meet the center line. After completing these folds, your model will have a much narrower, more streamlined shape. It should look like a long, thin kite. These folds are crucial for creating the structure of the hind legs, which are the engine投资者 for the frog’s jump. Check that everything is still symmetrical and all your creases are sharp and intentional.
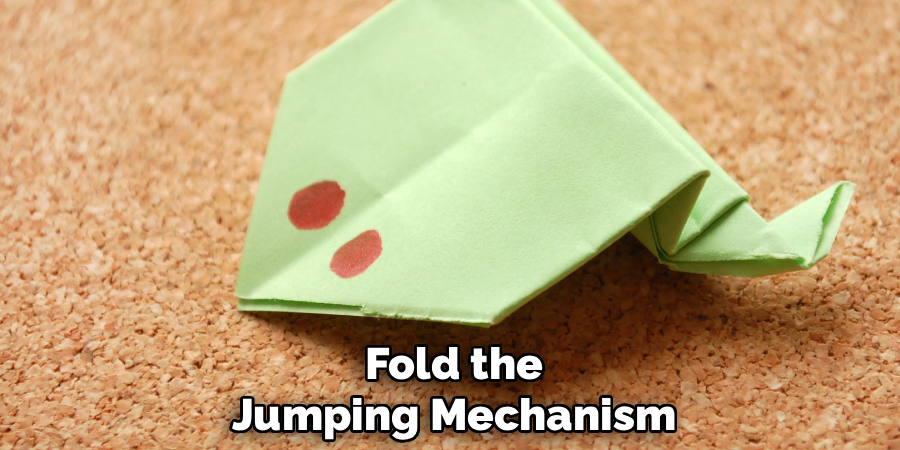
Step 7: Fold the Jumping Mechanism
This is the most important step for making your frog hop. It involves creating a “Z” fold, which acts as a spring. Look at your entire frog model. Fold the bottom half of the model upwards, so the pointed bottom end meets the “neck” of the frog, just below where the front legs are. Make a very strong horizontal crease across the entire width of the model. This first fold bends the frog in half, bringing its back legs up towards its body.
Now, take the folded edge you just created (the frog’s “waist”) and fold it back down. This fold should be made about halfway down the folded section. You are essentially folding the back leg section in half again, but in the opposite direction.
+This creates a Z-shaped pleat in the paper. It is critical that these two creases are very strong and parallel to each other, as they form the spring mechanism. Press them down with your thumbnail or a ruler to make them extra sharp. This accordion-like fold stores potential energy that will be released when you press down on the frog’s back.
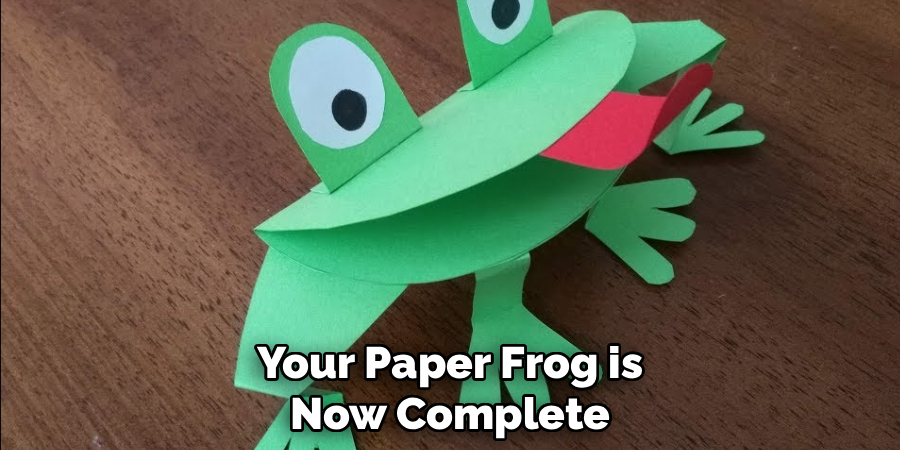
Step 8: Final Touches and Making it Hop
Your paper frog is now complete! Turn it over so it is standing on its newly formed legs. You can gently shape the front and back legs to give them a more three-dimensional look. You might want to slightly puff out the body to make it look less flat. This is also the time to get creative. Use your markers to draw on some eyes, or stick on a pair of googly eyes for a fun, animated look. You can add spots, stripes, or any other pattern to customize your amphibian friend.
To make your frog jump, place it on a hard, flat surface. Gently press down on the crease at the very back of the frog with your fingertip and then quickly slide your finger off. The stored energy in the Z-fold will release, launching your frog forward! Experiment with how much pressure you apply and where you press to see how you can make your frog jump最高的 or farthest. You can even make several frogs and have a jumping contest with friends.
Following these steps on how to make a frog using paper can be a fun and creative activity to do with friends and family. Not only does it allow you to use your hands and make something tangible, but it also teaches basic principles of engineering such as energy transfer and force.
Common Mistakes to Avoid
- Using non-square paper will result in an asymmetrical and poorly formed frog.
- Making sloppy or soft creases; sharp, precise folds are essential for a sturdy model.
- Folding the wrong layers, especially during the formation of the waterbomb base.
- Not making the final “Z” fold for the jumping mechanism strong enough, which will result in a frog that doesn’t hop.
- Rushing the steps; take your time to ensure each fold is accurate before moving to the next.
How Much Will It Cost?
The cost of making a paper frog 얼굴 is incredibly low, making it one of the most accessible crafts available. If you use materials you already have at home, the project can be completely free. A sheet of standard printer paper, a page from an old notebook, or a piece of junk mail can all be repurposed for this project. In this case, your only investment is your time.
If you decide to purchase supplies, the cost is still very minimal. A pack of origami paper, which can contain 50 to 200 sheets in various colors, typically costs between $5 and $15. This single pack will provide enough paper to make dozens, if not hundreds, of frogs. Optional decorative items like googly eyes or markers might add a few dollars to the total, but these are not essential for the project. Essentially, you can create hours of fun for less than the price of a cup of coffee.
Frequently Asked Questions
Q1: What Is the Best Kind of Paper to Use for a Hopping Frog?
A1: For a frog that hops well, the paper choice is quite important. Ideally, you want paper that is relatively thin but also stiff and crisp. Standard origami paper is excellent because it meets these criteria and holds a crease perfectly, which is vital for the jumping mechanism.
Thicker paper, like cardstock, can be difficult to fold accurately and may be too heavy and stiff to create a good spring. On the other hand, very thin paper, like tissue paper, might not have enough springiness. If you’re using printer paper, which is a good common alternative, make sure to press your folds very firmly to create a strong jumping spring.
Q2: Why Won’t My Paper Frog Jump?
A2: If your frog is refusing to hop, the issue almost always lies in the final folds that create the jumping mechanism. The most common reason is that the creases of the “Z” fold (Step 7) are not sharp enough. These folds need to be very crisp to store and release energy effectively.
Go back and refold this section, pressing down very firmly with your thumbnail or a hard, flat object like a ruler. Another potential issue is the proportions of the final folds. If the “Z” fold is too large or too small relative to the frog’s body, it may not work correctly. Lastly, ensure you are pressing on the correct spot—the very back of the frog—and sliding your finger off quickly to release the tension.
Q3: Can I Make a Frog From a Rectangular Piece of Paper?
A3: Yes, you can start with a rectangular piece of paper, but you will need to turn it into a square before you begin folding. This is a simple process. Take your rectangular sheet of paper, such as a standard A4 or 8.5×11 inch sheet, and fold one of the top corners down to meet the opposite edge of the paper.
This will create a large triangle and a smaller rectangular strip at the bottom or side. Crease the edge of the triangle firmly. You can then cut off the excess rectangular strip with scissors. When you unfold the triangle, you will have a perfect square, ready for you to begin Step 1 of the frog-making process.
Conclusion
Creating a paper frog is a delightful and engaging activity that brings the art of origami to life. With just a single sheet of paper and a series of simple, methodical folds, you can craft a charming little creature that actually jumps. This project is a perfect introduction to paper folding, offering a satisfying result without being overly complex. It’s an excellent way to practice focus, improve dexterity, and spend some quality time away from screens.
We hope this detailed guide has provided you with the confidence and knowledge to successfully fold your own hopping frog. Embrace the process, don’t worry about perfection on your first try, and most importantly, have fun. Once you’ve mastered this classic design, a whole world of origami creations awaits you. Thanks for reading this guide on how to make a frog using paper.