
Have you ever been fascinated by origami or the way simple paper can turn into something amazing? Crafting is not just about making pretty things—it also hones your creativity and patience, offering a deeply rewarding experience. Among the many fun items you can create from paper, the transforming ninja star stands out for its clever design and interactive appeal.
This guide on how to make a paper ninja star that transforms will take you through the process of making a paper ninja star that transforms, step by step. This project is perfect whether you’re a beginner trying out paper folding for the first time or an enthusiast looking for a fun new challenge. By the end, you’ll have a dynamic origami piece that can flip and change shape in your hands—a true conversation starter and a satisfying DIY toy.
Why Make a Paper Ninja Star That Transforms?
Creating a paper ninja star that transforms is more than just a fun craft project—it’s a unique way to develop new skills and enjoy a rewarding hands-on activity. Not only does it challenge your creativity and improve your precision, but it also introduces you to the intricate art of origami. The transforming mechanism adds an extra layer of excitement as it allows you to create something dynamic and interactive.
Additionally, this project is both inexpensive and accessible, requiring only paper and a bit of patience. Whether you use it as a decorative piece, a stress-relief fidget toy, or simply as a talking point with friends, the transforming ninja star combines artistry, curiosity, and functionality in an unforgettable way.
Tools and Materials You’ll Need
Before we get started, here are the tools and materials you’ll need for this project:
- Square sheets of paper (preferably origami paper)
- Scissors
- Glue or double-sided tape (optional, but recommended)
9 Step-by-step Guides on How to Make a Paper Ninja Star That Transforms
Step 1: Prepare Your Paper Squares
Before we begin folding, ensure your paper squares are ready. You’ll need exactly eight squares of equal size. If you are cutting them from standard printer paper, use your ruler to mark and trim each one accurately.
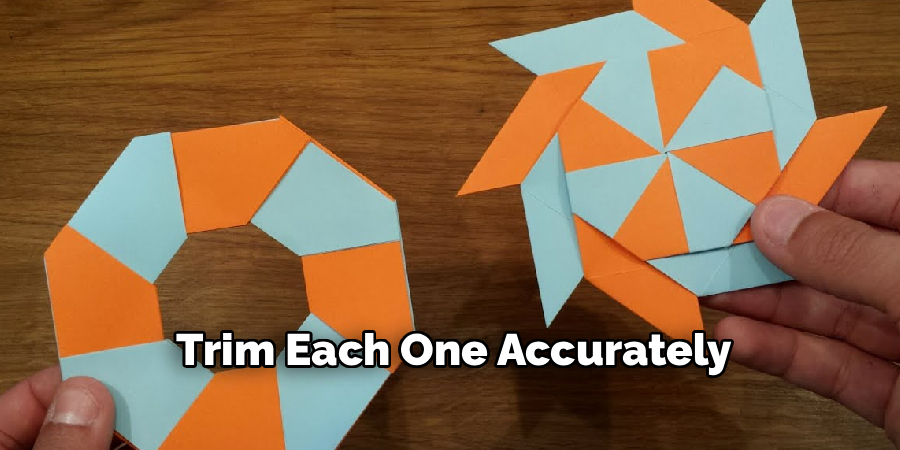
Lay out your paper squares on your work surface and choose which colors or patterns you want to alternate for the best design results. Any wrinkles or creases not part of the intended folds can affect the star, so smooth out each piece carefully. Double-check that all sheets match in size.
Step 2: Fold the First Module
Take one square paper and fold it in half lengthwise, aligning the edges neatly to create a crisp crease. Open the paper, then fold each side toward the center crease, essentially dividing the square into four equal strips.
Turn the paper over and fold it in half the other way, making a perpendicular crease. Again, open it up and fold both edges into the center crease. By now, your paper will have a grid of folds.
Step 3: Shape Each Module
With your grid created, fold two opposite corners toward the center to make a triangle at each end. This creates the pointed tips of your ninja star. Repeat this for all eight papers.
After folding the corners, reinforce the creases by pressing them down with your thumbnail or ruler. This makes assembly easier and gives your finished star a crisp, professional look. Stack your modules and set them aside.
Step 4: Create the Locking Tabs
Take the first paper module and fold two sides inward, forming small triangular tabs at the narrow ends of the strip. These tabs will help lock each module together when assembling the star.
Make sure the folds are sharp and the points are clean. Repeat this folding step for all eight modules. This process requires patience—precise folds ensure that the star will hold its dynamic shape.
Step 5: Begin Assembling the Star
Start by joining two paper modules together. Slide one module’s tab into the pocket of the neighboring module. The pieces should interlock snugly but not too tightly; adjust the tabs if necessary to fit.
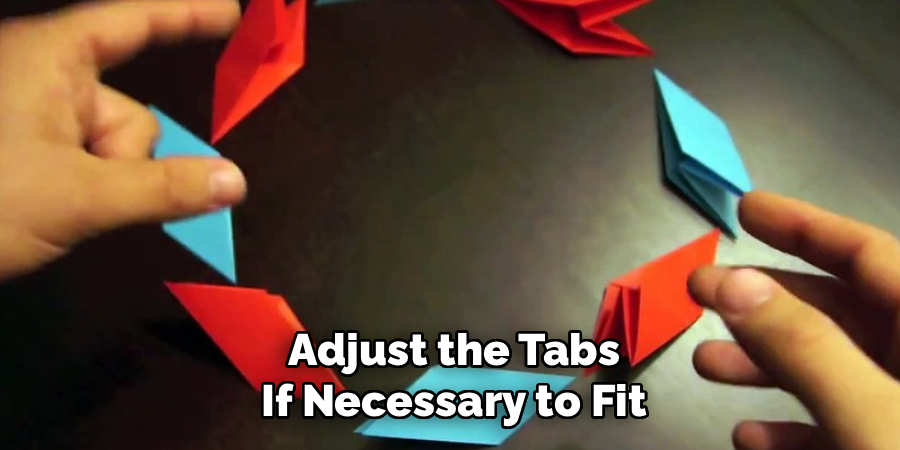
Continue connecting modules in this way, always sliding tabs into pockets. As you add more modules, you’ll start to see the star shape emerging. Work slowly and check that each connection is secure before moving to the next one.
Step 6: Complete the Circular Star
After attaching all eight modules, form them into a circular arrangement. The final tab and pocket connection might be a tight squeeze, so be gentle to avoid tearing the paper.
Double-check all the intersections to ensure they are locked in place. If any spots seem loose, adjust the tabs or reinforce them by pressing the folds again.
Step 7: Test the Transformation Mechanism
Now, gently hold your finished star by opposite points and try rotating sections to transform it. A proper ninja star should “open up” or flip into a new shape when you twist the sections.
If the transformation isn’t smooth, check all tab connections again. Sometimes a fold might need to be sharpened or a tab might need to be tucked a bit further for the mechanism to work fluidly.
Step 8: Decorate Your Ninja Star
Take this opportunity to add some flair to your ninja star. Use markers, pens, or stickers to decorate both sides. Adding metallic colors or shadow effects can make the star appear more dynamic when transformed.
You might even color-code the modules before assembly for a pattern effect when the star is flipped. Creativity is key, so try different looks and see what you like best.
Step 9: Care and Tips for Your Ninja Star
To make your paper ninja star last, keep it dry and store it flat when not in use. While the star is meant to be handled and played with, rough treatment may cause the paper to tear or loosen the connectors.
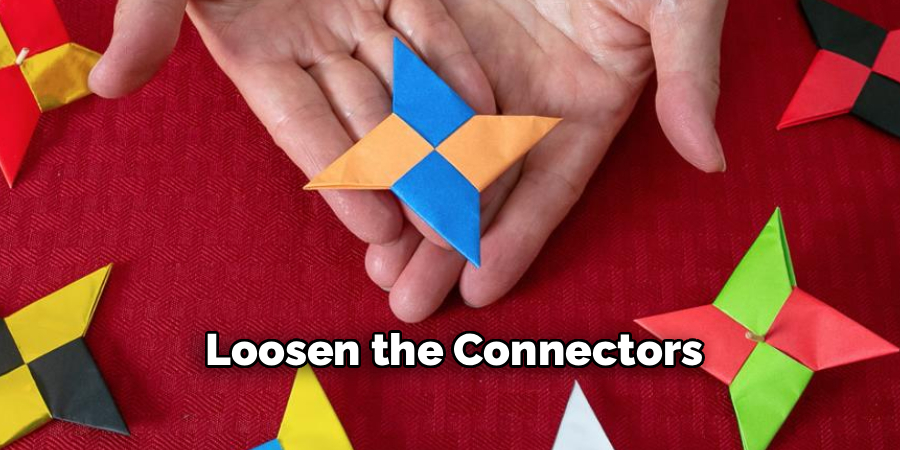
If you wish to create a more durable version, use slightly thicker paper or laminate the squares before folding. Remember, practice makes perfect, and each new star you build will turn out even better than the last.
Following these steps on how to make a paper ninja star that transforms from a square to a star and back again, you can impress your friends and family with your origami skills. You may also want to experiment with different sizes, colors, and patterns for your ninja star.
Frequently Asked Questions
Q1: How Durable Is a Paper Ninja Star That Transforms?
The durability of your paper ninja star mostly depends on the type of paper used and how carefully it is handled after assembly. Standard origami paper or lightweight copy paper will work for demonstration and occasional play, but thicker paper can increase longevity. To prolong its life, handle the star gently and avoid excessive bending or pulling where the modules are joined.
Moisture, spills, and rough manipulation can easily damage the structure, so try to keep your ninja star dry and out of direct sunlight for extended periods. If you want a lasting keepsake, consider using scrapbook or construction paper and reinforcing the joints with glue.
Q2: Can I Use Fewer or More Pieces to Make a Ninja Star?
The transforming ninja star design works best with eight modules, as described in this guide. This allows for both stability and smooth transformation when twisted. While it’s possible to experiment with other numbers, using fewer than eight modules typically leads to a less secure star, and more than eight can complicate the transformation mechanism.
If you’re feeling confident, try modifying the number of modules and see how the structure changes. Just remember that each variation may require adjusting fold techniques or tab sizes to ensure everything fits together properly.
Q3: What Should I Do If My Star Doesn’t Transform Smoothly?
If your paper ninja star gets stuck during transformation or feels stiff, there are a few things you can check. First, make sure every fold is crisp and each tab is securely tucked into the adjacent module’s pocket. Loose or uneven connections are a common cause of problems.
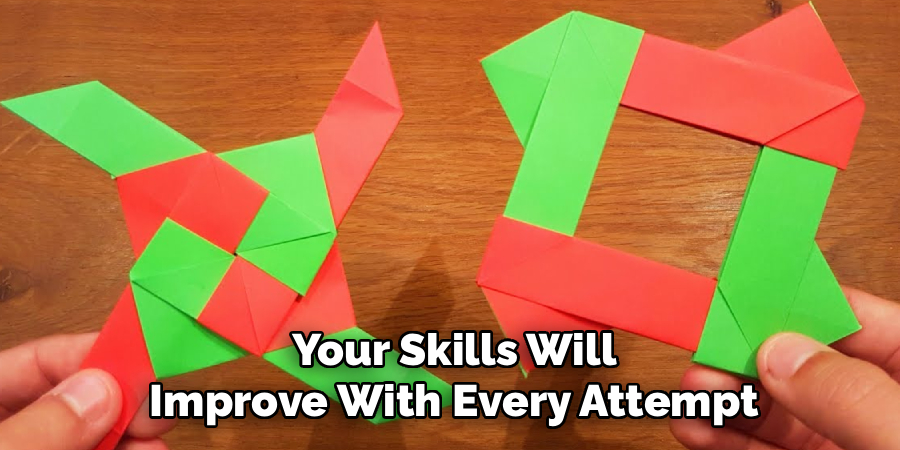
You can also try gently working the transformation motion several times to loosen the folds without tearing the paper. If persistent issues remain, disassemble and inspect each module for precision, then reassemble more carefully. Practice and patience are most important; your skills will improve with every attempt.
Conclusion
Making a paper ninja star that transforms is a rewarding craft that tests your patience and your attention to detail. Not only do you end up with a cool, functional toy to show your friends or family, but you also gain valuable skills in folding, spatial reasoning, and following multi-step instructions on how to make a paper ninja star that transforms. Each new attempt brings a fresh opportunity to perfect your technique and creativity.
Take time to experiment with different paper types, colors, and sizes to customize your ninja star. Share your creations with friends or challenge them to make their own, turning origami into a fun group activity. With a bit of time and practice, you’ll master the art of the transforming ninja star—and maybe even invent your own unique designs along the way. Happy folding!